
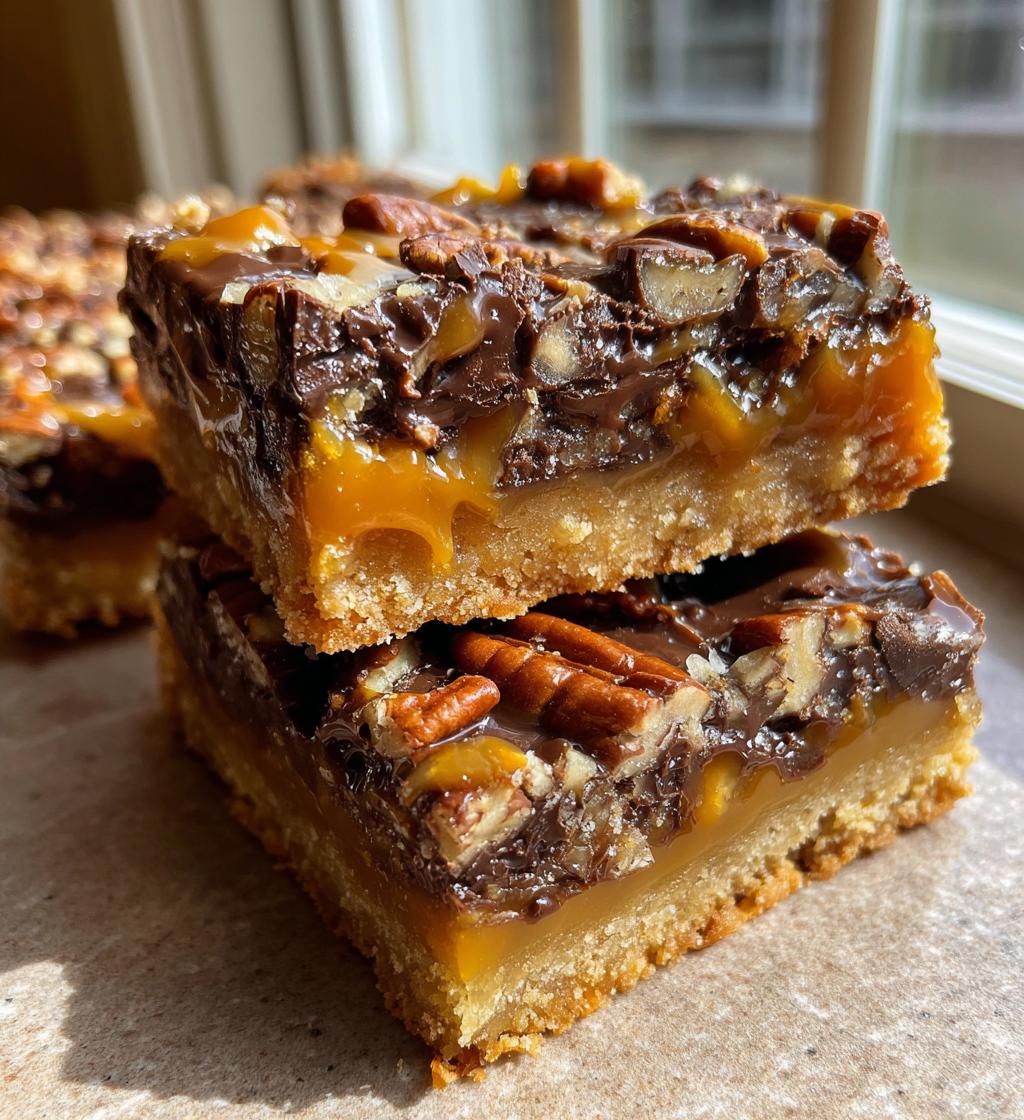
Oh my goodness, let me tell you about turtle bars! These little squares of heaven are the ultimate combination of chocolate, caramel, and nuts, and they just scream indulgence. I remember the first time I made these for a family gathering—everyone went absolutely nuts for them! I had to keep an eye on the pan, or they’d have disappeared before I even got a chance to serve them. Seriously, the gooey caramel dripping over the rich chocolate and the crunch of pecans just makes my heart sing. Plus, they’re so easy to whip up, you’ll find yourself making them for every occasion, or maybe just a cozy night in with a movie. Trust me, once you try these turtle bars, you’ll be hooked!
Ingredients for Turtle Bars
Here’s everything you’ll need to create these delicious turtle bars. Don’t worry, it’s super simple and you probably have most of these items in your pantry already!
- 1 cup chocolate chips (I like semi-sweet, but you can use milk chocolate if you prefer a sweeter taste)
- 1 cup caramel sauce (store-bought works great, but homemade is a lovely touch if you have the time)
- 1 cup pecans, chopped (feel free to swap in your favorite nuts if you want a different crunch)
- 2 cups graham cracker crumbs (this is what gives that amazing base flavor—yum!)
- 1/2 cup butter, melted (unsalted is best, but if you only have salted, just adjust the salt in your recipe)
Gather these goodies, and you’ll be all set to dive into some serious baking magic! Can’t wait for you to taste these!
How to Prepare Turtle Bars
Alright, let’s get down to the nitty-gritty of making these turtle bars! I promise, it’s as easy as pie—well, easier, actually! Just follow these simple steps, and before you know it, you’ll have a dreamy batch of turtle bars ready to devour.
- First things first, preheat your oven to 350°F (175°C). This is crucial because we want everything to bake evenly and get that delicious golden color.
- In a large bowl, mix together the graham cracker crumbs and melted butter until they’re well combined. It should look like wet sand—so satisfying!
- Next, grab a greased 9×13 inch baking dish and press that crumb mixture firmly into the bottom to form your crust. Make sure it’s nice and even so every bite is just as delightful.
- Now, it’s time to pour that luscious caramel sauce over the crust. Don’t be shy—get it all on there! It’s what makes these bars so irresistibly gooey.
- Sprinkle the chocolate chips and chopped pecans evenly on top. I like to press them down a bit into the caramel so they stick nicely.
- Pop the baking dish into your preheated oven and bake for about 15 minutes. You’ll want to keep an eye on them; the edges should be bubbly and the chocolate slightly melted.
- Once they’re done baking, take them out and let them cool in the pan for at least 10-15 minutes. I know it’s hard to wait, but trust me, letting them cool a bit will make cutting them into bars so much easier!
That’s it! You’re just a few steps away from turtle bar bliss. I can’t wait for you to taste them—enjoy every gooey bite!
Nutritional Information
So, let’s talk about the numbers behind these delightful turtle bars! It’s always good to know what you’re treating yourself to, right? Here’s an estimate of the nutritional values per serving, which is one of those scrumptious bars:
- Calories: 250
- Fat: 12g
- Saturated Fat: 6g
- Unsaturated Fat: 4g
- Trans Fat: 0g
- Cholesterol: 15mg
- Sodium: 150mg
- Carbohydrates: 32g
- Fiber: 1g
- Sugar: 20g
- Protein: 3g
Keep in mind, these values are estimates, and they might vary a bit depending on your specific ingredients. But hey, it’s nice to indulge in something that not only tastes amazing but also gives you a little boost of energy! Enjoy those turtle bars guilt-free!
Why You’ll Love Turtle Bars
Seriously, there are so many reasons to fall head over heels for these turtle bars! Here are just a few that I know you’ll appreciate:
- Quick to prepare: You can whip these up in no time—perfect for last-minute desserts or cravings!
- Easy to make: The steps are straightforward, so even if you’re a beginner, you’ll feel like a pro in the kitchen.
- Rich flavors: The combination of chocolate, caramel, and pecans creates a flavor explosion that’s just heavenly.
- Perfect for sharing: These bars are a crowd-pleaser, making them ideal for parties, potlucks, or family gatherings.
- Versatile: You can easily customize them with your favorite nuts or toppings for a personal touch.
- Gooey goodness: Each bite is a delightful mix of textures—crunchy, chewy, and oh-so-sweet!
Once you experience these amazing turtle bars, you’ll see why they’re a favorite in my home and hopefully yours too!
Tips for Success
Now that you’re all set to make these turtle bars, I want to share a few pro tips that’ll ensure yours turn out absolutely perfect every time. Trust me, these little nuggets of wisdom will take your baking game to the next level!
- Cool Completely: Make sure to let your turtle bars cool completely in the pan before cutting them into squares. This helps them firm up and makes slicing much easier. I know it’s tempting to dive right in, but patience pays off!
- Use Quality Ingredients: Since the flavors are so bold, using good quality chocolate and caramel really elevates the taste. It’s worth splurging a little here—you’ll notice the difference!
- Store Properly: Keep your turtle bars in an airtight container at room temperature for up to a week. If you want them to last longer, refrigerate them! They’ll stay fresh and delicious for up to two weeks in the fridge.
- Try Different Nuts: Feel free to experiment with different nuts if you’re feeling adventurous! Walnuts, almonds, or even hazelnuts can add a unique twist to your turtle bars.
- Don’t Overbake: Keep an eye on your bars while they’re baking. You want them to be bubbly and slightly golden around the edges but still a bit gooey in the center. Overbaking can lead to a drier texture, and we definitely don’t want that!
- Top with Sea Salt: For an extra layer of flavor, sprinkle a little sea salt on top right after they come out of the oven. The salty-sweet combo is to die for!
With these tips, you’re all set to make the best turtle bars ever! I can’t wait for you to share them with your friends and family—you’re going to be the star of dessert time!
Variations on Turtle Bars
If you’re like me and love to experiment in the kitchen, you’ll be thrilled to know that turtle bars are super versatile! There are so many delicious ways to mix things up and make this treat your own. Here are some fun variations to consider:
- Nutty Alternatives: While pecans are classic, you can swap them out for walnuts, almonds, or even macadamia nuts for a different flavor profile. Each nut brings its own unique crunch!
- Sea Salt Twist: For that delightful sweet-and-salty combo, sprinkle a bit of flaky sea salt on top right before baking. It really enhances the flavors and adds a gourmet touch!
- Coconut Delight: Add sweetened shredded coconut to the mix for a tropical flair. Just fold it into the chocolate and pecan layer, and you’ll have a whole new dimension of flavor!
- Dark Chocolate Decadence: If you’re a dark chocolate fan, use dark chocolate chips instead of semi-sweet for a richer, more intense chocolate experience. It pairs beautifully with the caramel!
- Fruit Fusion: Toss in some dried fruits like cranberries or cherries for a sweet and tart contrast. They add a lovely chewiness that complements the bars perfectly.
- Peanut Butter Swirl: Drizzle some creamy peanut butter over the top before baking and swirl it in with a knife. This adds an irresistible peanut flavor that pairs wonderfully with chocolate and caramel.
Feel free to mix and match these ideas to create your own signature turtle bars. The possibilities are endless, and I can’t wait to hear what delicious combinations you come up with! Happy baking!
Storage & Reheating Instructions
Alright, let’s talk about how to keep those scrumptious turtle bars fresh and fabulous! After all the hard work you put into making them, you want to enjoy every last bite, right?
To store your turtle bars, simply place them in an airtight container. I like to layer them with parchment paper between the bars to prevent sticking and keep them looking pretty. You can keep them at room temperature for about a week, but if you want them to last a little longer, pop them in the fridge! They’ll stay delicious for up to two weeks when refrigerated—just don’t forget to let them come to room temperature for a few minutes before diving in, as the flavors really shine when they’re slightly warm.
If you find yourself with leftover bars (which, let’s be honest, might not happen!), you can also freeze them. Just wrap each bar tightly in plastic wrap and then place them in a freezer-safe container. They’ll keep well for up to two months. When you’re ready to indulge again, simply take them out and let them thaw in the fridge overnight, or if you’re feeling impatient, you can microwave them for about 10-15 seconds to warm them up. Be careful not to overheat, though—you want that gooey goodness to stay intact!
With these storage tips, you can enjoy your turtle bars for days to come. Happy snacking!
Frequently Asked Questions
It’s totally normal to have questions when it comes to making these delicious turtle bars! I’ve compiled some of the most common queries I get, so let’s dive in and clear up any confusion!
Can I substitute the nuts?
Absolutely! If pecans aren’t your thing, feel free to use walnuts, almonds, or even hazelnuts. Each nut brings its own unique flavor and texture, so don’t be afraid to experiment!
What if I don’t have graham cracker crumbs?
No problem! You can use crushed digestive biscuits or vanilla wafer cookies as a substitute. Just make sure they’re finely crushed to create that lovely base.
How do I serve turtle bars?
These bars are perfect for sharing! Cut them into squares and serve them on a platter at parties or potlucks. They also make a delightful treat for movie nights at home—just grab a few and enjoy!
Can I make these turtle bars ahead of time?
Yes, you can! In fact, they’re great for making a day or two in advance. Just store them in an airtight container in the fridge, and they’ll be just as delicious when you’re ready to serve them.
How long do turtle bars last?
When stored properly in an airtight container, these bars can last up to a week at room temperature, or up to two weeks in the refrigerator. If you freeze them, they’ll stay fresh for about two months!
Can I add more chocolate?
Of course! If you’re a chocolate lover like me, feel free to up the ante with extra chocolate chips or even a drizzle of chocolate on top after baking. You can never have too much chocolate, right?
What should I do if my bars are too crumbly?
If your turtle bars are crumbly after baking, it usually means they need a bit more moisture. Next time, try adding a touch more melted butter to the graham cracker crust mixture to help it hold together better.
With these answers, I hope you feel more confident tackling your turtle bars! If any other questions pop up, don’t hesitate to reach out. Happy baking!
Print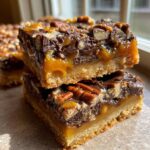
Turtle Bars: 7 Irresistible Ways to Indulge Guilt-Free
- Total Time: 30 minutes
- Yield: 12 bars 1x
- Diet: Vegetarian
Description
Turtle bars are a delicious treat made with chocolate, caramel, and nuts.
Ingredients
- 1 cup chocolate chips
- 1 cup caramel sauce
- 1 cup pecans, chopped
- 2 cups graham cracker crumbs
- 1/2 cup butter, melted
Instructions
- Preheat your oven to 350°F (175°C).
- Mix graham cracker crumbs and melted butter in a bowl.
- Press the mixture into a greased baking dish.
- Pour the caramel sauce over the crust.
- Sprinkle chocolate chips and pecans on top.
- Bake for 15 minutes.
- Let it cool before cutting into bars.
Notes
- Store in an airtight container.
- These bars can be refrigerated for longer shelf life.
- Prep Time: 15 minutes
- Cook Time: 15 minutes
- Category: Dessert
- Method: Baking
- Cuisine: American
Nutrition
- Serving Size: 1 bar
- Calories: 250
- Sugar: 20g
- Sodium: 150mg
- Fat: 12g
- Saturated Fat: 6g
- Unsaturated Fat: 4g
- Trans Fat: 0g
- Carbohydrates: 32g
- Fiber: 1g
- Protein: 3g
- Cholesterol: 15mg
Keywords: turtle bars, dessert, chocolate, caramel