
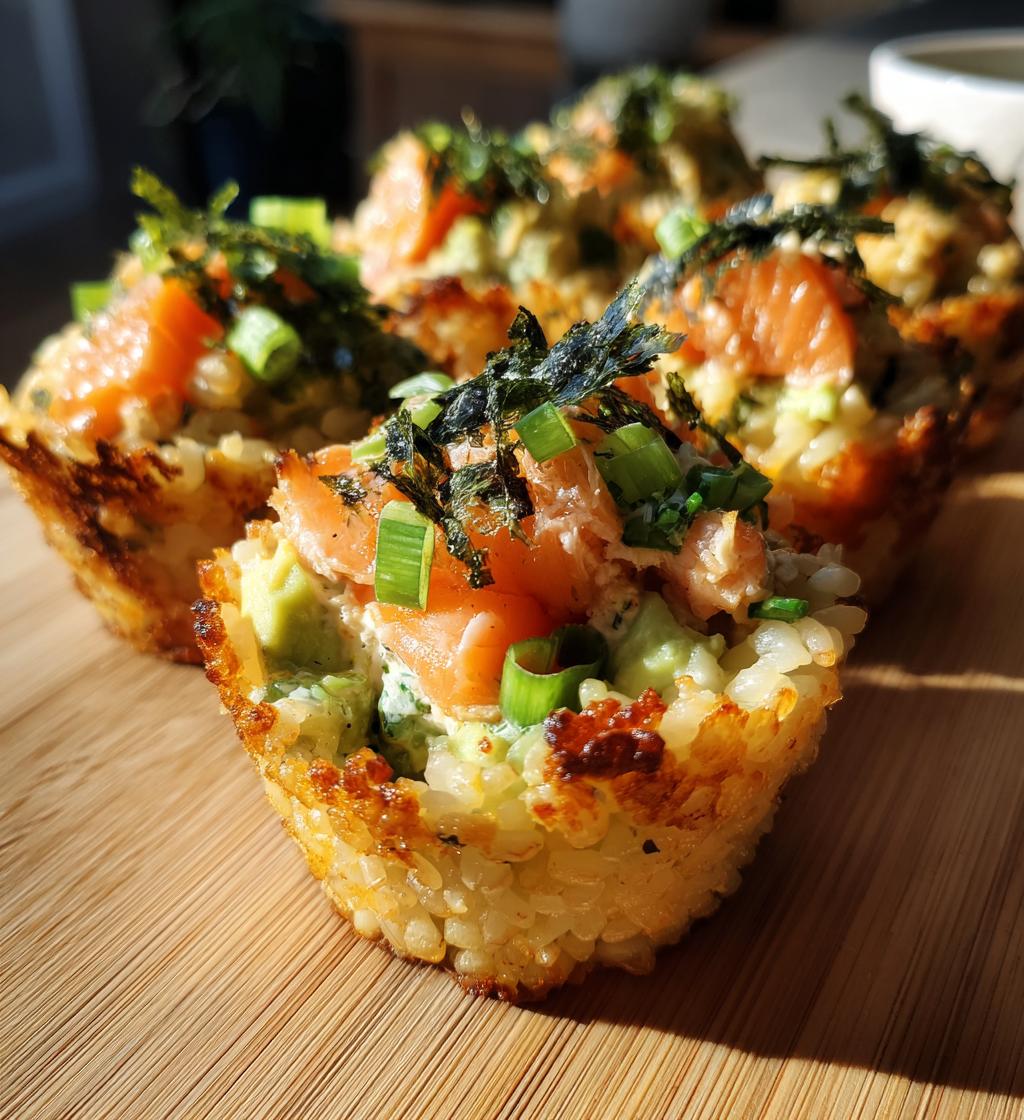
Oh my goodness, let me tell you about these baked salmon sushi cups! They’re a delightful mix of sushi flavors and comfort food all wrapped up in a cute little cup. I remember the first time I made these for a gathering—I was a little nervous, but they disappeared faster than I could say ‘sushi!’ The combination of flaky salmon, creamy avocado, and that satisfying crunch from the baked rice is just heavenly. Plus, they’re super easy to whip up, making them the perfect appetizer for any occasion. Whether you’re hosting a party or just feel like treating yourself, these little cups are sure to impress. Trust me, once you make them, you’ll be dreaming about them long after the last bite!
Ingredients for Baked Salmon Sushi Cups
Gathering the ingredients for these baked salmon sushi cups is half the fun! Here’s what you’ll need:
- 1 cup sushi rice: This is your base! It’s sticky and perfect for forming those lovely little cups.
- 2 cups water: For cooking the rice—just enough to make it fluffy and tender.
- 1 tablespoon rice vinegar: This adds that tangy sushi flavor we all love!
- 1 teaspoon sugar: A touch of sweetness balances out the vinegar.
- 1/2 teaspoon salt: Enhances all the flavors, so don’t skip it!
- 8 ounces cooked salmon, flaked: You can use leftover salmon or any cooked variety. Just make sure it’s flaky and tender.
- 1/4 cup mayonnaise: This gives the filling a creamy richness that’s simply irresistible.
- 1 tablespoon soy sauce: A little umami magic to deepen the flavor profile.
- 1 teaspoon sesame oil: Adds a nutty aroma that complements the salmon perfectly.
- 1 sheet nori, cut into small pieces: For that authentic sushi touch—plus, it adds a nice crunch!
- 1/4 cup green onions, chopped: These give a fresh bite and a pop of color.
- 1 avocado, diced: Creamy and delicious, avocado makes everything better!
Make sure you have everything ready before you start cooking, and you’ll be on your way to making these delightful cups in no time!
How to Prepare Baked Salmon Sushi Cups
Preparing these baked salmon sushi cups is a breeze! Just follow these steps, and you’ll have delicious, bite-sized treats ready in no time. Let’s dive right in!
Step-by-Step Instructions
- Preheat your oven: Set it to 375°F (190°C) while you get everything else ready.
- Rinse the sushi rice: Place the rice in a fine-mesh strainer and rinse it under cold water until the water runs clear. This removes excess starch and helps achieve that perfect sticky texture.
- Cook the rice: In a medium pot, combine the rinsed rice and 2 cups of water. Bring it to a boil over medium-high heat. Once boiling, reduce the heat to low, cover, and let it simmer for 20 minutes. Don’t lift the lid during cooking—let the steam work its magic!
- Season the rice: In a small bowl, mix together 1 tablespoon of rice vinegar, 1 teaspoon of sugar, and 1/2 teaspoon of salt until dissolved. Once the rice is cooked, remove it from heat and stir in this mixture gently. This adds that delightful sushi flavor!
- Prepare the salmon filling: In a separate bowl, combine the 8 ounces of flaked salmon, 1/4 cup of mayonnaise, 1 tablespoon of soy sauce, 1 teaspoon of sesame oil, and 1/4 cup of chopped green onions. Stir until everything is well mixed and creamy.
- Form the rice cups: Grease a muffin tin with a little oil to prevent sticking. Using wet hands (this helps keep the rice from sticking to you), press the sushi rice into the bottom and up the sides of each muffin cup. Make sure they’re well-formed but not too thick—aim for about 1/4 inch.
- Fill the cups: Spoon the salmon mixture into each rice cup, pressing it down gently to pack it in. Don’t be shy here; pile it up a bit for extra yumminess!
- Bake: Pop the muffin tin into your preheated oven and bake for 15-20 minutes, or until the tops are golden brown and slightly crispy. The aroma will be amazing—try not to peek too often!
- Garnish: Once out of the oven, let them cool for a few minutes. Just before serving, top each sushi cup with diced avocado and small pieces of nori for that extra flair and flavor.
And there you have it! Perfectly baked salmon sushi cups that are sure to impress. Enjoy the delightful combination of flavors and textures—you’ll be glad you made them!
Nutritional Information for Baked Salmon Sushi Cups
Now, let’s talk about the nutritional info for these baked salmon sushi cups. While I always say the best part is how they taste, it’s nice to know what we’re enjoying, right? Here’s a rough estimate of the nutritional values per cup:
- Calories: 200
- Fat: 10g
- Saturated Fat: 1g
- Unsaturated Fat: 8g
- Trans Fat: 0g
- Carbohydrates: 24g
- Fiber: 1g
- Sugar: 1g
- Protein: 7g
- Sodium: 300mg
- Cholesterol: 20mg
Keep in mind that these values can vary based on your specific ingredients and portion sizes, but this gives you a great idea of what to expect. Enjoy these delicious bites knowing they’re not just tasty, but also packed with nutrients from the salmon and avocado!
Why You’ll Love Baked Salmon Sushi Cups
- Quick and easy to prepare: These cups come together in no time, making them a lifesaver for busy days or last-minute gatherings.
- Flavorful and satisfying: With the perfect blend of creamy, flaky, and crunchy textures, every bite is a flavor explosion that will leave you wanting more!
- Perfect for parties or gatherings: They’re not just delicious; they look adorable on a platter, making them an instant hit with friends and family.
- Healthy option with salmon and avocado: Packed with protein and healthy fats, these cups offer a nutritious bite that you can feel good about indulging in.
Tips for Success with Baked Salmon Sushi Cups
When it comes to making the best baked salmon sushi cups, I’ve got some tried-and-true tips that’ll elevate your game. Trust me, these little nuggets of wisdom can make all the difference!
- Use short-grain sushi rice: It’s essential for that sticky texture! Long-grain rice won’t hold together as well, which means your cups might fall apart. You want them to hold their shape perfectly, so go for short-grain!
- Don’t skip the rinsing: Rinsing the rice until the water runs clear is crucial! It removes excess starch, preventing the rice from being too gummy. The result? Perfectly fluffy, delicious rice cups!
- Mix up the flavors: Feel free to experiment with the filling! Swap out the salmon for cooked shrimp or crab if you’re in the mood for something different. You can even add some spicy mayo for a kick!
- Keep an eye on baking time: Ovens can vary, so start checking the cups around the 15-minute mark. You want the tops to be golden and slightly crisp, but you don’t want to overbake them, or they might dry out.
- Let them cool slightly: Once they come out of the oven, give them a few minutes to cool before attempting to remove them from the tin. This helps them firm up and makes it easier to get them out without breaking.
- Serve with dipping sauces: Consider pairing these cups with a side of soy sauce, spicy mayo, or even a drizzle of teriyaki for an extra flavor boost. They’re delicious on their own, but a little dip can take them over the top!
- Garnish just before serving: For the freshest taste and best presentation, add the avocado and nori just before serving. This keeps everything looking vibrant and prevents the avocado from browning too quickly.
With these tips in your back pocket, you’ll be well on your way to making the most scrumptious baked salmon sushi cups that everyone will love! Happy cooking!
Variations of Baked Salmon Sushi Cups
One of the best things about these baked salmon sushi cups is how versatile they are! You can really let your creativity shine and switch things up based on what you have on hand or what flavors you’re craving. Here are some fun variations to consider:
- Spicy Tuna Cups: Swap out the salmon for spicy tuna! Just mix diced raw tuna with a bit of sriracha, mayonnaise, and green onions for a zesty twist.
- Vegetable Delight: For a vegetarian option, load up your cups with sautéed veggies like bell peppers, zucchini, and mushrooms. Toss them with a bit of soy sauce and sesame oil for that delicious umami flavor.
- Crab and Avocado: Use lump crab meat instead of salmon, and don’t forget to include some extra avocado for that creamy goodness. You’ll have a fresh, luxurious bite!
- Smoked Salmon Bliss: If you’re a fan of smoked salmon, use it in place of cooked salmon for a deeper, smokier flavor. Pair it with cream cheese and capers for a bagel-inspired sushi cup!
- Sweet and Spicy: Add a few diced jalapeños or a drizzle of sweet chili sauce into your salmon mixture for a sweet and spicy kick that will tantalize your taste buds!
- California Roll Cups: Incorporate diced cucumbers and imitation crab, along with a hint of wasabi in the filling. Top with sesame seeds for that true sushi vibe!
- Herbed Salmon: Mix in fresh herbs like dill or cilantro with your salmon filling for a fresh pop of flavor that brightens everything up.
Feel free to mix and match these ideas based on your cravings or dietary needs! The possibilities are endless, and that’s what makes these baked salmon sushi cups so much fun to make. Get creative and enjoy every delicious bite!
Storage & Reheating Instructions for Baked Salmon Sushi Cups
So, you’ve got some baked salmon sushi cups left over—lucky you! Proper storage is key to keeping these little gems fresh and delicious for your next snack attack. Here’s how to do it right:
- Cool Completely: First things first, let the cups cool completely at room temperature. If you try to store them while they’re still warm, they can get soggy—yikes!
- Store in an Airtight Container: Once cooled, transfer them to an airtight container. You can separate layers with parchment paper to prevent them from sticking together. This little trick will help keep them nice and intact!
- Refrigerate: Pop the container in the fridge where they’ll last for about 3-4 days. They make for a quick and satisfying snack or meal when you need something easy!
- Freezing for Later: If you want to keep them for longer, you can freeze the sushi cups! Just wrap each cup tightly in plastic wrap, then place them in a freezer-safe bag or container. They’ll hold up well for about 2 months. Just remember to label them with the date!
When you’re ready to enjoy your delicious leftovers, here’s how to reheat them:
- Thawing: If frozen, let them thaw in the fridge overnight before reheating. This ensures they stay moist and flavorful!
- Reheat in the Oven: Preheat your oven to 350°F (175°C) and place the cups on a baking sheet. Heat them for about 10-15 minutes, or until they’re warmed through and the tops are slightly crispy again. This method helps maintain that delightful texture!
- Microwave Option: In a pinch, you can reheat them in the microwave. Just place a cup on a microwave-safe plate and heat for about 30-45 seconds. Keep an eye on them to avoid overcooking, as they can get a bit chewy!
And there you have it! With these simple storage and reheating tips, you can enjoy your baked salmon sushi cups long after the initial batch is gone. Happy snacking!
Serving Suggestions for Baked Salmon Sushi Cups
When it comes to enjoying your delectable baked salmon sushi cups, the right accompaniments can elevate the whole experience! Here are some of my favorite serving suggestions that will make your meal even more delightful:
- Fresh Salad: A light, crisp salad with mixed greens, cucumber, and a citrus vinaigrette pairs beautifully with the richness of the sushi cups. It adds a refreshing crunch that balances the flavors.
- Dipping Sauces: Serve these cups with a side of soy sauce or a tangy ponzu sauce for dipping. You could also whip up a quick spicy mayo by mixing mayonnaise with a bit of sriracha for a creamy kick!
- Pickled Vegetables: Some pickled ginger or daikon radish on the side adds a nice zing and complements the sushi flavors wonderfully. It’s a traditional touch that enhances the overall meal.
- Edamame: A bowl of steamed edamame sprinkled with sea salt makes for a fun and wholesome side. It’s easy to snack on while you enjoy your sushi cups!
- Avocado Slices: If you love avocado (who doesn’t?), serve extra slices on the side. They add a creamy texture that pairs perfectly with the savory salmon.
- Sesame Seeds: Consider sprinkling some toasted sesame seeds over the cups right before serving. Not only do they add a lovely nutty flavor, but they also make for an appealing presentation!
- Green Tea: A warm cup of green tea is a fantastic beverage choice that complements the flavors of the sushi cups while aiding digestion. It’s calming and refreshing!
Feel free to mix and match these suggestions based on your mood and occasion. The key is to create a delightful meal that highlights the amazing flavors of your baked salmon sushi cups. Enjoy every bite!
Print
Baked Salmon Sushi Cups: 7 Deliciously Irresistible Treats
- Total Time: 50 minutes
- Yield: 12 cups 1x
- Diet: Gluten Free
Description
Baked salmon sushi cups are a delicious and easy-to-make appetizer combining salmon and sushi flavors in a convenient cup.
Ingredients
- 1 cup sushi rice
- 2 cups water
- 1 tablespoon rice vinegar
- 1 teaspoon sugar
- 1/2 teaspoon salt
- 8 ounces cooked salmon, flaked
- 1/4 cup mayonnaise
- 1 tablespoon soy sauce
- 1 teaspoon sesame oil
- 1 sheet nori, cut into small pieces
- 1/4 cup green onions, chopped
- 1 avocado, diced
Instructions
- Preheat your oven to 375°F (190°C).
- Rinse the sushi rice under cold water until the water runs clear.
- Combine the rice and water in a pot and bring to a boil. Reduce heat, cover, and simmer for 20 minutes.
- In a small bowl, mix rice vinegar, sugar, and salt until dissolved. Stir this into the cooked rice.
- In a separate bowl, combine flaked salmon, mayonnaise, soy sauce, sesame oil, and green onions.
- Grease a muffin tin and press the rice into the bottom and sides to form cups.
- Spoon the salmon mixture into each rice cup.
- Bake for 15-20 minutes until the tops are golden.
- Top with diced avocado and nori pieces before serving.
Notes
- Use leftover salmon for a quick meal.
- Adjust ingredients based on your taste.
- These cups can be served warm or at room temperature.
- Prep Time: 20 minutes
- Cook Time: 30 minutes
- Category: Appetizer
- Method: Baking
- Cuisine: Japanese
Nutrition
- Serving Size: 1 cup
- Calories: 200
- Sugar: 1g
- Sodium: 300mg
- Fat: 10g
- Saturated Fat: 1g
- Unsaturated Fat: 8g
- Trans Fat: 0g
- Carbohydrates: 24g
- Fiber: 1g
- Protein: 7g
- Cholesterol: 20mg
Keywords: baked salmon sushi cups, sushi, salmon, appetizer